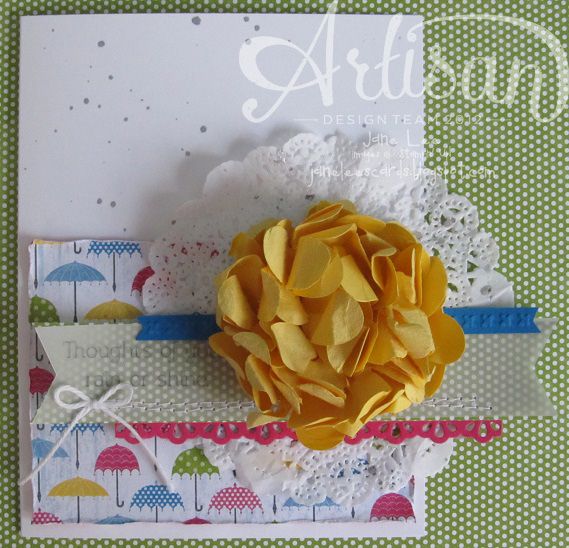
I already know what you're going to say. You're going to say,"There is NO way you could ever mail that card. Pieces hang off the edge AND the flower is 1/2" tall." I know. But it's cute and I like it. So when you CASE this card, just put it on top of your gift or just leave it on your neighbor's porch or whatev's. It's cute like it is.
I don't know why but I have the hardest time, lately, creating projects with these super cutesy stamp sets. The images are so cute!! I don't know what it is - maybe the constant stream of all-things-boy in my house? I don't know. So this is the card that seemed to all but assemble itself on my desk. I like how it turned out. It's still cutesy but has just the right amount of "me" added to it.
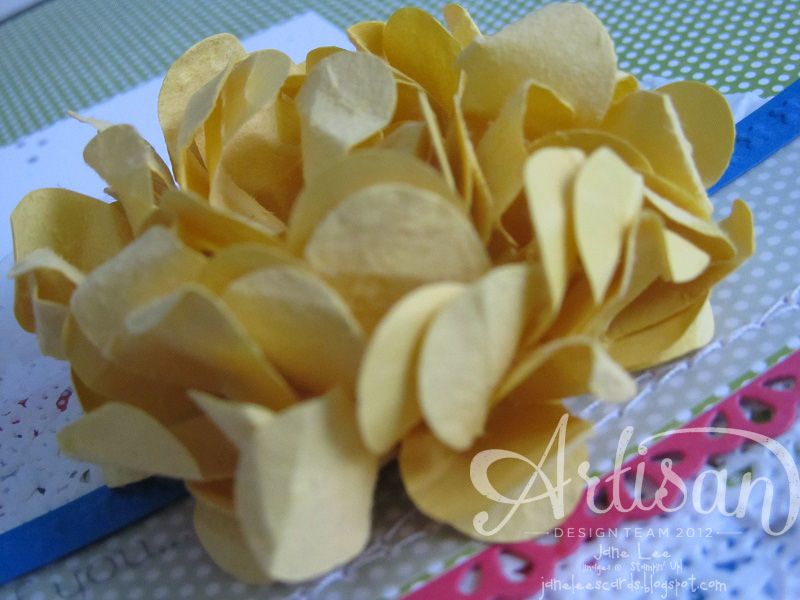
Do you know how to make these types of flowers? A super cool friend of mine showed me how to do this a year ago and this is the first time I've put it to work. I cut out 6 flowers from the smallest flower die on the Bigz XL Flower Folds Die. Use 1 flower for the base. I separated the petals ONLY. What that means is that I separated the 2 pieces of paper that are stuck together to create 1 piece of cardstock. Make sense? Then crinkle and separate FULLY the other 5 flowers. With your 10 thin flowers pieces, crinkle each one in the center and twist and hot glue onto your flower base. Keep going around the outside until everything is filled in and then stick your last piece in the center. Fluff your flower and you're done. Pretty cool? Do you need step by step WITH pictures? Let me know. You're probably more advanced than I am and you already know how to do it anyway. I'm way behind in the flower game.
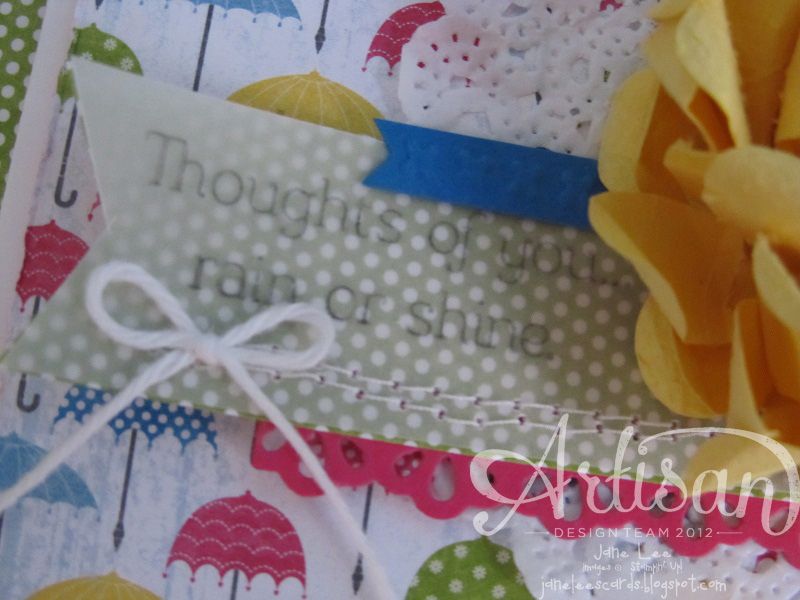
Cute little bows make everyone's day.
Stamps: Rain or Shine
Paper: Daffodil Delight, Melon Mambo, Pacific Point, Vellum, Whisper White Cardstock, Sunshine & Sprinkles DSP
Accessories and Tools: White Tea Lace Paper Doilies, White Baker's Twine, Silver Foil Smooch Spritz, Big Shot, Bigz XL Flower Folds (the smallest die), Finishing Touches Edgelits, Needlepoint Border Embossing Folder, Bone Folder (to distress paper), Paper Snips, SNAIL, Sticky Strip, Multipurpose Liquid Glue
Other: Sewing machine, white thread, hot glue gun
Order everything from my site {HERE}
Now head on over to Jeanna's blog. I love love LOVE her and all her projects. I promise you will not be disappointed.
Do you follow me on Pinterest? You can.



Beautiful!! That flower is OVER the top! I adore it. Jane's #1 Fan!! ;-)
ReplyDeleteLOVE this card!!! Everything is fabulous - the flower, the doily, the stitching, distressed edge... all of it! :)
ReplyDeleteLove your layers and textures.
ReplyDeleteThat FLOWER is PERFECT-A!!! Another Jane Masterpiece!! :)
ReplyDelete